'Peanut Allergy Princess' is the story of one mom, one Princess with food allergies (to peanuts and brazil nuts) and our journey through the stress of life with food allergies. Here you will find many recipes, tips on living (and enjoying life) with food allergies, thoughts from a mother of 3 kids (The Brothers and The Princess) and insights into our life. Welcome!

Showing posts with label Lunch. Show all posts

Friday, August 23, 2013

Back to School 2013

I cannot seem to wrap my head around the fact that summer is really over. Where did it go? Back in June, the summer seemed to stretch far out ahead of us - almost like it would never end. We had so many exciting plans - and yet summer always seems to go by so fast that we never get to half of them. But enough reminiscing about summer. It is time to move my thoughts onto the school year ahead.

Brother #1 and #2 - 4th grade and 1st grade. How did I get so old?!

The Princess is not in school yet, so I just have to focus on The Brothers. Both boys started at a new school this year. While not pleasant, some change is good and I am hoping this change will be beneficial. Brother #2 will be eating lunch at school this year. Since I am not a fan of school lunch, I have been wracking my brain to come up with new and fun lunch ideas that The Brothers will eat.

Brother #1 is uber picky and only wants what everyone else is getting (namely a sandwich, chips and a cookie). We don't really do chips, so I spent most of last year trying new things to fill his lunch container. Brother #2 is a bit more adventurous (and doesn't care about what others think of his lunch) so we will be trying out some different things with him.

Last year, we tried out Ziploc containers with divided compartments. They worked so great for us (and saved on plastic baggies) that we will be using them again this year. I have a thermos for hot foods (which Brother #1 would never use since you don't need a thermos if you are taking sandwiches every day). I am also planning on picking up some Ball Plastic Freezer jars - we may attempt to send smoothies for school lunch.

I have put together a list of different websites with some great school lunch ideas. No matter what type of allergy your child has or if you prefer vegan, gluten free or clean-eating lunches, there will be something in this list for you!

Keeley McGuire: Lunch Made Easy: 20 Non-Sandwhich School Lunch Ideas for Kids!

New Nostalgia: 14 Healthy School Lunch Recipes Your Kids Will Love

Healthy Kitchen Guide: Simply Healthy School Lunch Ideas

Super Healthy Kids: Sticky Stacky Sandwiches

Have a great school year!!


Jana

Tuesday, April 23, 2013

Chunky Monkey Muffins

As you know, I have a thing for muffins. My kids love them, I love them, and my husband loves them (because they are fast and easy to grab on his way to work). They work for breakfast, lunch, snacks and even dinner (because breakfast for dinner is always a hit to switch things up a bit). I was introduced to this "type" of muffin in a gluten-free version and it looked so yummy, I wanted to find a "regular" version. This is what I have come up with. We LOVE it!! I hope you do too.

Of course, we have Mickey muffin tins!!

Chunky Monkey Muffins

1/2 cup sugar (or raw sugar)
2 eggs *
1 Tbsp vanilla
4 bananas, mashed
3/4 cups buttermilk (I have used regular milk and almond milk with great success)
1 cup butter, melted (or 6 oz. coconut oil, melted)
1 3/4 cups wonder flour **
1 1/2 cups white whole wheat flour (or regular whole wheat too)
2 tsp baking powder
1 tsp baking soda
1 tsp salt
2 Tbsp cinnamon
1 cup shredded coconut, unsweetened
1 cup chocolate chips (or 1/2 cup chocolate chips and 1/2 cup cinnamon chips)
1/2 cup finely chopped walnuts (optional)

Preheat oven to 350 degrees F.

Cream together sugar and wet ingredients (eggs through butter). * If you would like to replace the eggs in this recipe, I would use 1/3 cup applesauce for 1 egg and 1 Tbsp ground flax mixed with 3 Tbsp water (let sit until it gels) for the second egg. 

Mix in dry ingredients. ** If you are using a different whole grain flour than wonder flour, cut the amount back to    1 1/2 cups. Fold in the shredded coconut and chocolate chips.

Line or spray muffin tins. Scoop batter into muffin tins and fill 3/4 full. If using chopped nuts, sprinkle on top of the batter.

Bake for about 20 minutes. This recipe makes 2 dozen muffins (which I like - a little work with a big result). These can be frozen and thawed in the refrigerator overnight. I love to eat these with a little coconut oil spread on them (instead of butter) or some all-fruit jam. Yum!!

Recipe adapted from Tasty Kitchen
Disregard the dirty muffin tin - focus on the delicious looking muffins!


Jana

Tuesday, March 5, 2013

Homemade Ramen Noodles

Brother #1 loves ramen noodles. He could eat them every day. I prefer that he not eat them every day - or ever really. I stopped buying packaged ramen about a year ago and he was so sad. After thinking about it, I decided it wouldn't be that hard to recreate ramen at home, but with healthier ingredients and no preservatives and additives. Luckily, he loves the homemade kind just as much. This might take a few minutes longer than the packaged kind, but it is worth the wait (and is still pretty quick and easy).

Healthy Ramen

Olive oil

Vegetables, diced (we use carrots and celery)

4 cups water (or chicken broth/stock)

3-4 Tbsp chicken flavoring (if not using stock - try and find some without MSG. I get mine at Costco)

Noodles* (approx 6-8 ounces)

Vegetable Seasoning (I have been using McCormick Vegetable, while not the best, it is still better than the eating packaged ramen)

Sriracha Hot Sauce

1 -2 Eggs, beaten (optional)


Heat 1-2 Tbsp olive oil in sauce pan. When hot, add your diced vegetables and cook for 3-5 minutes until soft.

Add water/broth (and chicken flavoring, if using) to your saucepan and bring to a boil. When the water is boiling, add the pasta *(We use basic whole-wheat spaghetti or angel hair pasta but you can get fancy and use an asian noodle. If you are using a noodle with a shorter cooking time, you may need to increase your saute time to ensure the vegetables aren't crunchy.)

About 1 minute before the noodles are finished, add your beaten egg (is using) to the pan and swish around to break up any large egg chunks. When the noodles are finished cooking, add the vegetable seasoning (or whatever seasoning you choose) and hot sauce. The hot sauce is super spicy so a little bit (and I mean a little bit - we use about 1/2 tsp) goes a long way.


Side note: when The Princess's daddy and I were dating, I lived with a Korean roommate. She would make ramen all the time and add the Sriracha hot sauce. She would judge how spicy it was by how many "turns" she made in her bowl with the hot sauce. She thought it was so fun to challenge everyone who came to visit to a competition to see who could handle the most "turns". The Princess's daddy beat everyone with 4 turns (but after living for 2 years in Korea, he had an unfair advantage)! Now, don't try that at home unless you really like spice. 

Ladle soup into a bowl and enjoy!


Jana

Tuesday, February 26, 2013

Homemade Almond Butter

Since peanut butter is not an option for us to eat, Nutella has more sugar than any other ingredient, store bought almond butter is usually processed in a facility with peanuts (or may contain peanuts) and Sunbutter and Wow butter are disgusting, we aren't left with many options for quick and easy sandwiches. So, I decided to attempt my own almond butter. I think it has changed my life!! It is so delicious, super nutritious and very easy (with the right tools).

It took me a few batches to get my recipe perfected, so don't give up if it doesn't work out just right the first time. I am going to give you a few tips that I learned in my journey for making the perfect almond butter.

Homemade Almond Butter

2 cups raw almonds (if you have a large food processor, you can add another cup or two)
pinch of sea salt
sweetener (if desired)

1. The nuts release their oils better when they are warm and I prefer the flavor of roasted almonds for my almond butter, so the first step is to roast the almonds. Preheat the oven to 350 degrees F . Place almonds in a baking dish and spread so they aren't stacked on top of each other. Cook for 10-12 minutes. You will begin to smell them when they are finished (and it smells good!).


2. While the almonds are still warm, place them in your blender or food processor (I prefer using the twister jar with my Blendtec). ***Since I have only used my Blendtec to make almond butter, I don't have a  detailed description on how to make it in a food processor. There are plenty of tutorials online if that is your preferred method and you want more information.*** In the twister jar, it takes me about 5 minutes (and usually 4 cycles) to get the consistency that I want (when I start with warm almonds). If you are using a food processor or the four side or wild side jar on the Blendtec, it will take a bit longer and a bit more work (scraping the sides). 


3. Turn on the blender to speed 3 or 4 and begin twisting. Allow it to run a full cycle.
Notice it is still a bit chunky

Check the consistency - if you want a smoother almond butter, turn blender to speed 5 and run a full cycle.

After cycle number 3 (at speeds between 3 and 5) - we are almost there.
Getting creamier, but still has a few small chunks

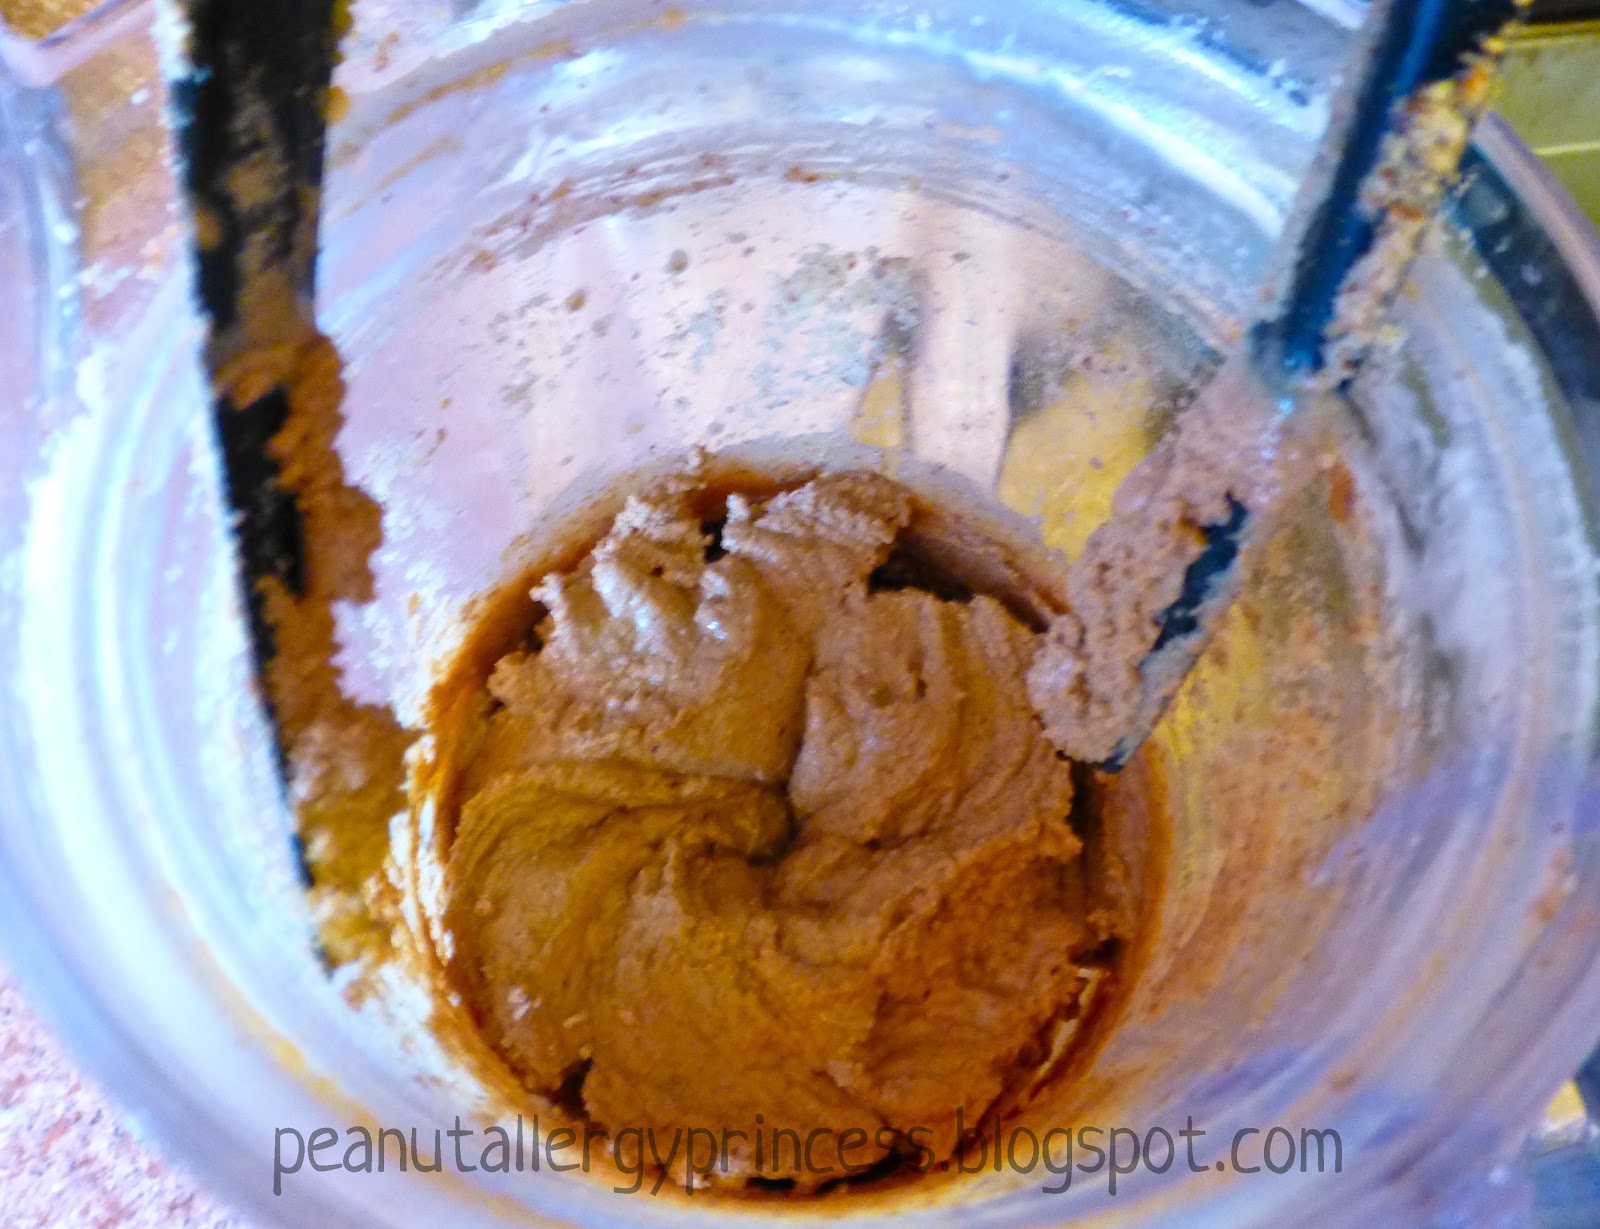
I ran it one more cycle just to get it super creamy. Sometimes, I use a spatula to move it around a little in between cycles. Beware!! It is super loud and your blender will get really warm - there may even be smoke that escapes when you open the lid in between cycles. This is normal (although it freaked me out a bit at first... I thought I was burning out my blender!)

4. When your almond butter has reached your desired consistency, add the salt and any sweetener you desire (we prefer about 2 Tbsp of raw sugar but you can use anything you want - honey, agave, maple syrup, powdered sugar, etc...) and pulse until well blended.

Perfect!!


5. Scoop into jars and enjoy!! To fill this quart size jar - I made 2 full recipes.
The Princess's new favorite way to enjoy almond butter - on brown rice cakes. Yum!!


Jana

Tuesday, February 19, 2013

Homemade Mac and Cheese

I am happy to report that my back is feeling much better and so is my hip (although I haven't done any dancing or yoga since Wednesday... ). My grandpa's funeral was lovely and gave us a chance to visit with family who came in from out of state. Now, after a chaotic weekend, I am ready to get back to "regular" life.

Mac and Cheese is a comfort food for a lot of people and a favorite of a lot of kids. But the stuff in the box is full of additives, preservatives and not a lot of real cheese. We like to make our own at home. This recipe takes a little bit of time (and quite a bit of cheese) so we don't eat it very often. But every once in awhile, it is just what a kid (and an adult) needs.

1 lb pasta (any shape. I buy all my egg free pasta at Costco. It is also organic)

1 1/2 cups milk (we use original almond milk)

2 Tbsp whole grain flour

2-3 cups shredded cheese (the sky is the limit here depending on your taste - we like colby jack mixed  
                                                         with mozzarella and a little parmesan)

12 tsp salt

1/4 tsp powdered mustard

Steamed Broccoli (or any other sides or mix-ins you prefer)


Bring about 4 quarts of water to boil over high heat in the pasta pot. Add the pasta and a pinch of salt. Cook until the pasta is al dente. Drain and set aside.

When the pasta has finished cooking, prepare the cheese sauce. Begin warming 1 cup of milk in a saucepan over medium heat. Whisk together the remaining 1/2 cup of milk and the flour until there are no lumps. When you start to see tendrils of steam rising from the warming milk, whisk in the milk-flour mixture. Continue whisking gently until the milk thickens slightly to the consistency of heavy cream, about 3 to 4 minutes.

Turn the heat to low and begin mixing in the shredded cheese, one cup at a time, into the milk. Stir in the salt and mustard. Stir until all the cheese has melted and the sauce is creamy. Taste and adjust seasonings as desired. Remove the sauce from the heat.

Serve mac and cheese immediately with steamed broccoli. Leftovers can be stored in an air-tight container in the refrigerator for up to a week. If the sauce is a little dry when reheating, mix in a splash of milk to make it creamy again.

If you can't do dairy - check out this recipe for vegan mac and cheese. We have tried this with mixed reviews - Brother #1 loves it, Brother #2 and The Princess not so much.

Recipe lightly adapted from The Kitchn

Jana

Tuesday, February 5, 2013

Teriyaki Bowtie Salad

Since yesterday's post was really supposed to be last weeks post, I decided to reward you and post again today. Yeah!

Everyone needs a delicious go-to salad for family gatherings. Something to spice up a regular green salad or spinach salad. This is one we love. It is great as a side dish or even a main dish (on those warm summer nights which I must be dreaming of since I am posting this when the temperature is barely above freezing). Chicken can be added, but we like it vegetarian.

I use my homemade teriyaki sauce in this recipe. You can make the sauce in advance and keep it in the fridge.

TERIYAKI BOW-TIE SALAD

Salad:
10 oz. egg-free whole grain bow-tie pasta, boiled until just tender (I buy mine at Costco)

1 cup water chestnuts, drained (I like mine sliced in half)

1/4 cup parsley, finely chopped

1/2 bunch green onions, chopped

1/2 cup dried cranberries or cherries

1/4 cup raw sunflower seeds

1/2 cup honey roasted cashews

Grilled chicken breasts, cut into strips (optional)


2 cans mandarin oranges, drained and well-rinsed (optional, we choose not to use these)

5 - 10 oz spinach (or we like using romaine lettuce)

Dressing:
1/2 cup olive oil*

1/4 tsp salt

2 Tbsp raw sugar

1/3 cup white wine vinegar

1/2 cup teriyaki sauce (I like to add a bit more)

1/2 tsp pepper

Whisk all dressing ingredients together.

Combine all ingredients except oranges and spinach (or romaine). Place in a large ziploc bag with dressing and squish the bag until everything is covered in sauce. Place in refrigerator overnight (I have been known to put the recipe together in the morning and eat it that same night - you just need time to let the flavors blend).

Immediately before serving, pour the salad into a bowl and add the oranges. Serve over a bed of spinach or romaine lettuce.


Jana

Thursday, August 30, 2012

Breakfast Pockets

We are halfway through our week of back-to-school breakfasts - and I might have saved the best for last. Today's breakfast is a kid favorite. It is easily customizable for everyone's taste and can also be taken to school for lunch.

These are a little bit labor-intensive - start to finish they take me about an hour (when I don't have any interruptions) so they are best done over the weekend or the night before. Unless you like to get up early and bake. 

The dough that I currently use is only half whole-wheat. I am still on the search for the best 100% whole wheat dough that doesn't take all day to make. When I do find it, I will be sure to let you know. Warning: this dough is not sweet, more like a pizza crust. Feel free to experiment with your own favorite dough. I grind my own wheat (hard white wheat) and store it in the freezer. You can easily substitute store-bought wheat flour (just make sure it says 100% whole wheat) or if you are seriously lacking in time or dough making skill, you can use store-bought dough (Gasp!). I like Rhodes dough. Just thaw the rolls according to package directions and one doubled in size, you are ready to go.

So, lets get started:

Breakfast Pockets

1/2 cup scalded non-dairy milk (I used hemp milk)

2 Tbsp. coconut oil

1 Tbsp. turbinado sugar (I used regular sugar - since it is such a small amount)

1 tsp. salt

1 Tbsp. yeast

1/2 cup warm water

1 cup all-purpose flour

1 1/2 cup whole wheat flour

Fillings such as nut butters, jam, Nutella, bananas, eggs, bacon, cheese, finely diced bell peppers, onions, etc...


Add the oil to the hot milk. It is ok if your coconut oil is solid (or very firm), it will melt when mixed with the hot milk. Add the sugar and salt to the milk mixture and cool to lukewarm. Dissolve the yeast in the warm water. Add yeast mixture to the warm milk mixture. Pour everything in the base of a stand mixer. Add flour. Knead well. You can knead this by hand if you really want to, but I let my mixer do it.

Once the dough ball is nice and firm and no longer sticking to the sides, remove from stand mixer and place in greased bowl. Let stand in warm place for 15 minutes. I heat my oven for a minute or 2 until it is just warm and than stick my bowl in. You can also place a pan of boiling (or very hot) water under the bowl of dough in the oven. The moist heat will also help it rise.

Section dough into pieces (how many you end up with will just depend on how big they are). I generally end up with around 14 dough balls.

Roll out dough balls on lightly floured surface.

Here comes the fun (and creative) part: the filling!! There are many different options. Here are some of our favorites. Eggs, small pinch of cheese, large pinch of finely diced bell peppers. We also like to add bacon once in awhile for an extra special treat.

Homemade almond butter and homemade low sugar raspberry apricot freezer jam - or any kind of combination.

Nutella and bananas (for The Princess)
Try not to focus on the terrible quality of this picture - I could not find another Nutella/banana example. 
I have no idea what happened here, but this may well be the worst picture I have ever taken.

Grab up the sides of the dough and pinch shut. Be careful not to overfill or the rolls have a tendency to pop open while baking.

Bake in a 350 degree F oven for 15-20 minutes. They can be stored in an airtight container or plastic bag in the refrigerator for a week for freeze for up to 3 months. To reheat, microwave for 1 minute.

Recipe inspired by Budget Gourmet Mom


Jana