'Peanut Allergy Princess' is the story of one mom, one Princess with food allergies (to peanuts and brazil nuts) and our journey through the stress of life with food allergies. Here you will find many recipes, tips on living (and enjoying life) with food allergies, thoughts from a mother of 3 kids (The Brothers and The Princess) and insights into our life. Welcome!

Showing posts with label Breakfast. Show all posts

Tuesday, April 30, 2013

Granola


Store-bought granola is often labeled as a health food. But, it generally isn't.  The problem... store-bought granola is often full of preservatives and other such unwanted items.  If that isn't bad enough, they are also often contaminated with peanuts (if the don't actually contain them). And if you can solve both of those problems, the cost usually is not worth the actual granola.

We did not eat much granola before we made our diet switch (because of the above reasons). Homemade healthy granola was one of the first things I started making myself about a year ago when I found out how healthy it could be and how easy it was. I went to a class taught by the Green Smoothie Girl and thought she had some good points on eating whole foods (or real foods). So, I went to her website and began looking at her recipes and tips. When I found this granola recipe and made it for the first time, I was hooked. I made a few changes to suit my tastes better, but it is still as healthy and delicious!

This recipe if full of fiber and will clean you out (in case you need that). If is also full of omega-3 fatty acids. Most Americans get far too many omega-6 fatty acids and not enough omega-3 fatty acids (you can thank processed foods for that). We should be getting a 1:1 ratio of omega-6's to omega-3's (or if that seems too hard, at least a 4:1) where most people get a ratio closer to 20:1 (or even higher!). So, in conclusion, eat lots of healthy granola (yes that would be a plug for my recipe) and less processed foods For more information on this subject (fatty acids), read "In Defense of Food" by Michael Pollan.

Granola

Mix well:
4 cups rolled oats (not instant)

1/2 cup raw wheat germ (found in the bulk section of a health food store)

1/2 cup shredded coconut (unsweetened - also found at health food stores in bulk)

1/4 cup ground flax seed (fresh ground is better)

3/4 cup nuts and/or seeds (walnuts, pecans, cashews, almonds, pumpkin seeds or hemp seeds)

1/8 cup sesame seeds (found in the bulk section of a health food store)

1 Tbsp. cinnamon


Heat on stove until barely melted, stirring together:
1/3 cup honey

1/4 cup pure maple syrup or molasses

1/4 cup water

1/3 cup extra virgin coconut oil

1/2 Tbsp vanilla

Once all liquids are melted and stirred together, pour liquid ingredients into the dry ingredients and mix until distributed evenly (this takes a few minutes). Spread granola out on greased cookie sheet.

Bake at 250 degrees F for 60-90 minutes or until dry (and enjoy the delicious smell in your house). Remove from oven and allow to cool completely. Once cooled, scrape the granola off the pan with a spatula - the chunkier the better. Keep in the pantry in cooler weather for up to 2 weeks or in the fridge for up to six weeks in a sealed container (I use a ziploc bag).

Here are some ways we like to eat granola:
* directly out of the bag as a snack
* added to homemade trail mix
* in a bowl with milk like cereal
* on top of plain greek yogurt mixed with homemade berry sauce (and a dab of honey)

Recipe adapted from Green Smoothie Girl


Jana

Tuesday, April 23, 2013

Chunky Monkey Muffins

As you know, I have a thing for muffins. My kids love them, I love them, and my husband loves them (because they are fast and easy to grab on his way to work). They work for breakfast, lunch, snacks and even dinner (because breakfast for dinner is always a hit to switch things up a bit). I was introduced to this "type" of muffin in a gluten-free version and it looked so yummy, I wanted to find a "regular" version. This is what I have come up with. We LOVE it!! I hope you do too.

Of course, we have Mickey muffin tins!!

Chunky Monkey Muffins

1/2 cup sugar (or raw sugar)
2 eggs *
1 Tbsp vanilla
4 bananas, mashed
3/4 cups buttermilk (I have used regular milk and almond milk with great success)
1 cup butter, melted (or 6 oz. coconut oil, melted)
1 3/4 cups wonder flour **
1 1/2 cups white whole wheat flour (or regular whole wheat too)
2 tsp baking powder
1 tsp baking soda
1 tsp salt
2 Tbsp cinnamon
1 cup shredded coconut, unsweetened
1 cup chocolate chips (or 1/2 cup chocolate chips and 1/2 cup cinnamon chips)
1/2 cup finely chopped walnuts (optional)

Preheat oven to 350 degrees F.

Cream together sugar and wet ingredients (eggs through butter). * If you would like to replace the eggs in this recipe, I would use 1/3 cup applesauce for 1 egg and 1 Tbsp ground flax mixed with 3 Tbsp water (let sit until it gels) for the second egg. 

Mix in dry ingredients. ** If you are using a different whole grain flour than wonder flour, cut the amount back to    1 1/2 cups. Fold in the shredded coconut and chocolate chips.

Line or spray muffin tins. Scoop batter into muffin tins and fill 3/4 full. If using chopped nuts, sprinkle on top of the batter.

Bake for about 20 minutes. This recipe makes 2 dozen muffins (which I like - a little work with a big result). These can be frozen and thawed in the refrigerator overnight. I love to eat these with a little coconut oil spread on them (instead of butter) or some all-fruit jam. Yum!!

Recipe adapted from Tasty Kitchen
Disregard the dirty muffin tin - focus on the delicious looking muffins!


Jana

Tuesday, March 12, 2013

Green Eggs

This is going to be a quick post... I am working on making some changes (again) to the blog. Stay tuned for some updates.

For now, this is a plug (I guess you could call it) for one of my favorite websites, 100 Days of Real Food (www.100daysofrealfood.com). She has some great ideas and advice on real food eating. Obviously with food allergies, we have to pick and choose what advice and recipes we use but I still love following her.

Since The Princess has outgrown her egg allergy, we have been introducing them slowly into her diet. She is now able to tolerate scrambled eggs - although she doesn't eat them too often. As part of our diet change, we are trying to avoid food colorings and dyes, so when I came across this recipe for "healthy" green eggs on the 100 days website, I knew I had to try it.  We celebrated Dr. Suess's birthday by making green eggs and ham and reading aloud the book while the kids ate.  The Princess and The Brothers didn't even notice a difference - and there really wasn't a taste difference. 

 This is a TERRIBLE picture, but the only one I snapped in the chaos of the morning

While Dr. Suess's birthday has passed, St. Patrick's Day is coming up and healthy green eggs would be a great way to celebrate!


Click here for the recipe and enjoy your own green eggs!!


Jana

Tuesday, February 26, 2013

Homemade Almond Butter

Since peanut butter is not an option for us to eat, Nutella has more sugar than any other ingredient, store bought almond butter is usually processed in a facility with peanuts (or may contain peanuts) and Sunbutter and Wow butter are disgusting, we aren't left with many options for quick and easy sandwiches. So, I decided to attempt my own almond butter. I think it has changed my life!! It is so delicious, super nutritious and very easy (with the right tools).

It took me a few batches to get my recipe perfected, so don't give up if it doesn't work out just right the first time. I am going to give you a few tips that I learned in my journey for making the perfect almond butter.

Homemade Almond Butter

2 cups raw almonds (if you have a large food processor, you can add another cup or two)
pinch of sea salt
sweetener (if desired)

1. The nuts release their oils better when they are warm and I prefer the flavor of roasted almonds for my almond butter, so the first step is to roast the almonds. Preheat the oven to 350 degrees F . Place almonds in a baking dish and spread so they aren't stacked on top of each other. Cook for 10-12 minutes. You will begin to smell them when they are finished (and it smells good!).


2. While the almonds are still warm, place them in your blender or food processor (I prefer using the twister jar with my Blendtec)***Since I have only used my Blendtec to make almond butter, I don't have a  detailed description on how to make it in a food processor. There are plenty of tutorials online if that is your preferred method and you want more information.*** In the twister jar, it takes me about 5 minutes (and usually 4 cycles) to get the consistency that I want (when I start with warm almonds). If you are using a food processor or the four side or wild side jar on the Blendtec, it will take a bit longer and a bit more work (scraping the sides). 


3. Turn on the blender to speed 3 or 4 and begin twisting. Allow it to run a full cycle.
Notice it is still a bit chunky

Check the consistency - if you want a smoother almond butter, turn blender to speed 5 and run a full cycle.

After cycle number 3 (at speeds between 3 and 5) - we are almost there.
Getting creamier, but still has a few small chunks

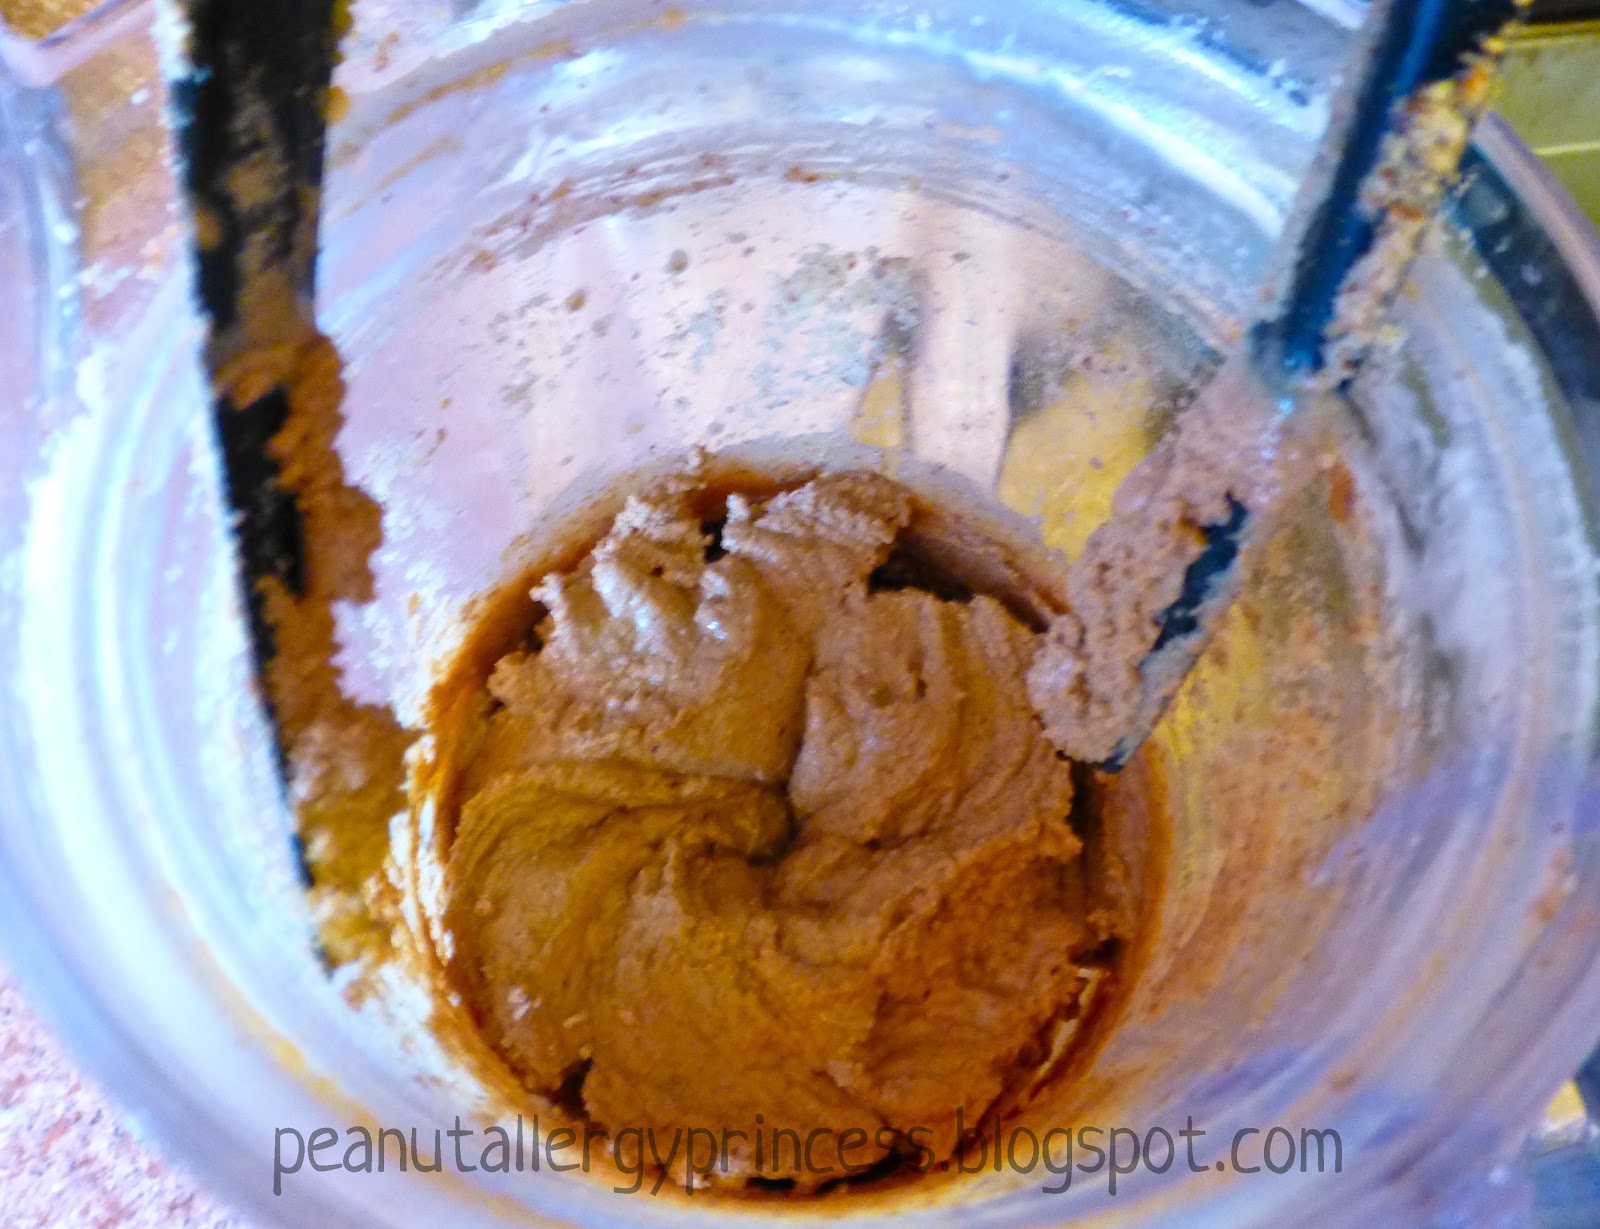
I ran it one more cycle just to get it super creamy. Sometimes, I use a spatula to move it around a little in between cycles. Beware!! It is super loud and your blender will get really warm - there may even be smoke that escapes when you open the lid in between cycles. This is normal (although it freaked me out a bit at first... I thought I was burning out my blender!)

4. When your almond butter has reached your desired consistency, add the salt and any sweetener you desire (we prefer about 2 Tbsp of raw sugar but you can use anything you want - honey, agave, maple syrup, powdered sugar, etc...) and pulse until well blended.

Perfect!!


5. Scoop into jars and enjoy!! To fill this quart size jar - I made 2 full recipes.
The Princess's new favorite way to enjoy almond butter - on brown rice cakes. Yum!!


Jana

Tuesday, February 12, 2013

Egg-less Double Chocolate Waffles with Berry Sauce

Chocolate waffles are a tradition in my family. When I was younger, we would have them every Christmas morning at my grandparents house.... smothered in whip cream and strawberries. Yum! I didn't realize until a few years ago that they weren't something my grandpa had just made up but that other people ate them too.

My grandpa used to make them by mixing some dry chocolate milk mix in with prepared waffle batter. As a kid, I didn't care, but as an adult, I wanted something a little more... sophisticated (not to mention made from scratch). I have found a winner! Waffles are notoriously hard to do without eggs, but these waffles taste equally as yummy as their counterparts with eggs.

Obviously it isn't Christmas (when I ate these growing up) but the rest of my family prefers another Christmas breakfast. Since I have to eat these at least once a year, Valentine's is another perfect time for this scrumptious breakfast (although I may or may not eat these more than just once a year).

Egg-less Double Chocolate Waffles
1 3/4 cups wonder flour (or 1 1/2 cups other whole grain flour or all-purpose flour)

1/2 cup cornstarch*

1 Tbsp baking powder

1/3 cup cocoa powder

1/8 tsp cinnamon

1 tsp salt

1/2 cup no-sugar added applesauce

1/2 tsp apple cider vinegar

2 Tbsp raw sugar

1 3/4 cups milk (I used almond milk)

1/2 tsp vanilla extract

1/2 cup coconut oil, softened

1/3 cup chocolate chips

Berry Sauce 
3 cups berries, diced if large**

1/4 cup naturally sweetened jam (any flavor you want!)

2 Tbsp hot tap water

Whipped cream (optional)

**You will need about 3 cups of berries - you can use any combo you would like.You can use fresh berries, frozen berries or a combo of both depending on the season.  I used 1 cup of frozen strawberries and 2 cups of a frozen 3 berry mix from Costco (blackberries, raspberries and blueberries). If you think in advance, you can thaw in the fridge overnight, otherwise, pop frozen berries into the microwave for 30 seconds to 1 minute.

Start by making the berry sauce so it can sit while you make the waffle batter. Combine jam and warm water and whisk until combined. Add in the berries and gently stir until combined. Gently mash berries with a fork to break up larger berries (you can leave as chunky as you want). If  your berries are still a bit frozen, you can blend them in a food processor (which I prefer to do).

Set berry sauce aside and make waffle batter.

In a large bowl, sift together the flour, cornstarch, baking powder, cocoa powder and salt. Combine well and set aside.  * If you don't have cornstarch on hand - feel free to just use another 1/2 cup of flour. The cornstarch helps make the waffles more crispy, but using more flour would be just fine!

In another bowl, whisk together the applesauce, vinegar, sugar, milk, vanilla and coconut oil.

Blend the dry ingredients with the wet until just combined. It is ok if your batter is lumpy. Don't overmix! Fold in the chocolate chips into the batter. Pour batter onto a greased waffle iron and bake according to your waffle iron's instructions.

Top waffle with a generous helping of berry sauce and a dollop of whip cream. Try not to moan as you eat... it'll be hard, I promise!

Waffle recipe adapted from Vegan Heartland
Berry sauce from Our Best Bites
This is the yummy, gooey mess you are left with when you have eaten half of your waffle! 
And, I might have overdone the whip cream on this one, maybe. 
Jana

Tuesday, January 22, 2013

Pineapple Bliss Green Smoothie

We have an on/off relationship with green smoothies. The Brothers DO NOT like them, which I find weird since they will eat an entire plate of spinach, but won't drink it when it is mixed with fruit. Go figure.  I get tired of fighting them over it so sometimes we just don't do them. But, lately we are back with daily green smoothies. The Princess LOVES green smoothies and will drink mine if she doesn't have her own. This is her absolute favorite green smoothie (and mine too)! It tastes more like a treat than a good-for-you green smoothie.

I buy green grapes in the summer when the price is good and freeze them in 2 cup portions. I do the same with pineapple. I prefer this made with coconut milk (although it is still good with water) - it makes it nice and creamy. Yum! I think it tastes like pina colada.

This makes a large amount. We like to freeze the extra in "smoothie pops" (using Norpro silicone molds) or into popsicles.

If you aren't a green smoothie fan yet, here are some reasons to get more greens in your diet (whether through smoothies or eaten by themselves).
1. Helps with varicose veins
2. Builds a high red blood cell count
3. Helps prevent cancer
4. Helps clean the liver
5. Helps counteract toxins
6. Provides iron to your organs
7. Improves vision
8. Revitalizes vascular systems in the legs
9. Eliminates body odor
10. Helps with milk production
11. Regulates menstruation
12. High in vitamin K and E
13. Contains more bio available calcium than other foods
14. Contain essential amino acids
15. Loaded with chlorophyll (meaning oxygen)
16. Creates an alkaline environment

Greens are the most nutrient dense food out there. So, give this smoothie a try for a super yummy way to eat greens!

Pineapple Bliss Green Smoothie

2 cups water (or coconut milk - or even coconut water)

1 banana

3-4 handfuls of spinach (I freeze mine so it lasts longer)

1/4 large pineapple (fresh/frozen - not canned)

2 cups frozen green grapes

sliver of lime with the peel (be careful, it is easy to get too much)


Put all ingredients in blender in the order listed (I use my Blendtec and this is the order recommended for it, you can switch up the order for your blender if you need to). Blend until smooth and creamy. Enjoy!!

Recipe from Unconventional Kitchen


Jana

Tuesday, January 15, 2013

Cinnamon Chip Scones

Growing up in Utah, scones were bread dough that was deep fried and topped with honey and butter. It wasn't until I visited back east when I was pregnant with The Princess that I learned there were other types of scones. While I still like the "Utah" variety, I prefer the "real" scones (I'm sure I will offend some Utahns by referring to their scones as not the real thing). "Real" scones are much healthier, not so greasy, and definitely not so messy.

I had a bag of cinnamon chips laying around my house (that I bought on a whim because they looked so yummy) and needed to figure out what to do with them. Lately, I have been craving some warm bread or muffins (since the temperature hasn't made it above 25 degrees for more than 2 days in the last 2 weeks) and decided I would combine my need to use my cinnamon chips with my craving... and this was the result. Yummy scones that are healthy enough for a quick breakfast paired with some fruit, a green smoothie (because if you are like me, a green smoothie alone will not last all morning), or some plain greek yogurt mixed with fruit. The Princess says it is like eating a cookie... a cookie for breakfast!


Cinnamon Chip Scones

2 1/4 cups wonder flour (or other whole grain flour)

1 1/4 cups soft white wheat flour

1/4 cup raw sugar

2 1/2 tsp baking powder

1/2 tsp baking soda

1/2 tsp salt

3/4 tsp cinnamon

1/4 tsp nutmeg

3/4 cups cold butter

1 cup buttermilk

1 tsp vanilla

3/4 cup cinnamon chips*

Melted butter (optional)

Coarse sugar (optional)

Preheat oven to 425 degrees F.

In the bowl of a stand mixer, combine dry ingredients. Cut in butter until coarse crumbs form. I used the blade of my mixer to do this instead of doing it by hand and it worked great (and was much easier!). Stir in buttermilk and vanilla. Fold in cinnamon chips. Turn onto a lightly floured surface and knead gently for a few minutes.

Here is where you will have two options. I made my scones both ways and they worked out equally as well, just pick the method you prefer.

Method #1: Divide in half and pat into 7-inch round circles. Brush with melted butter and sprinkle with coarse sugar (like turbinado sugar). Cut into 6 or 8 wedges. Place on baking sheet.  Bake at 425 degrees F for 10-12 minutes or until the tops begin to brown.

Method #2: Divide in half and pat into two 8-inch pie pans. Brush with melted butter and sprinkle with coarse sugar (like turbinado sugar). Bake at 425 degrees F for 12-14 minutes or until the tops begin to brown. Cool slightly, cut into 6 or 8 wedges.

* I was able to find Hershey's brand cinnamon chips that are not manufactured in a facility with peanuts. Don't buy the Nestle brand.

Recipe adapted from How Sweet It Is


Jana

Friday, December 14, 2012

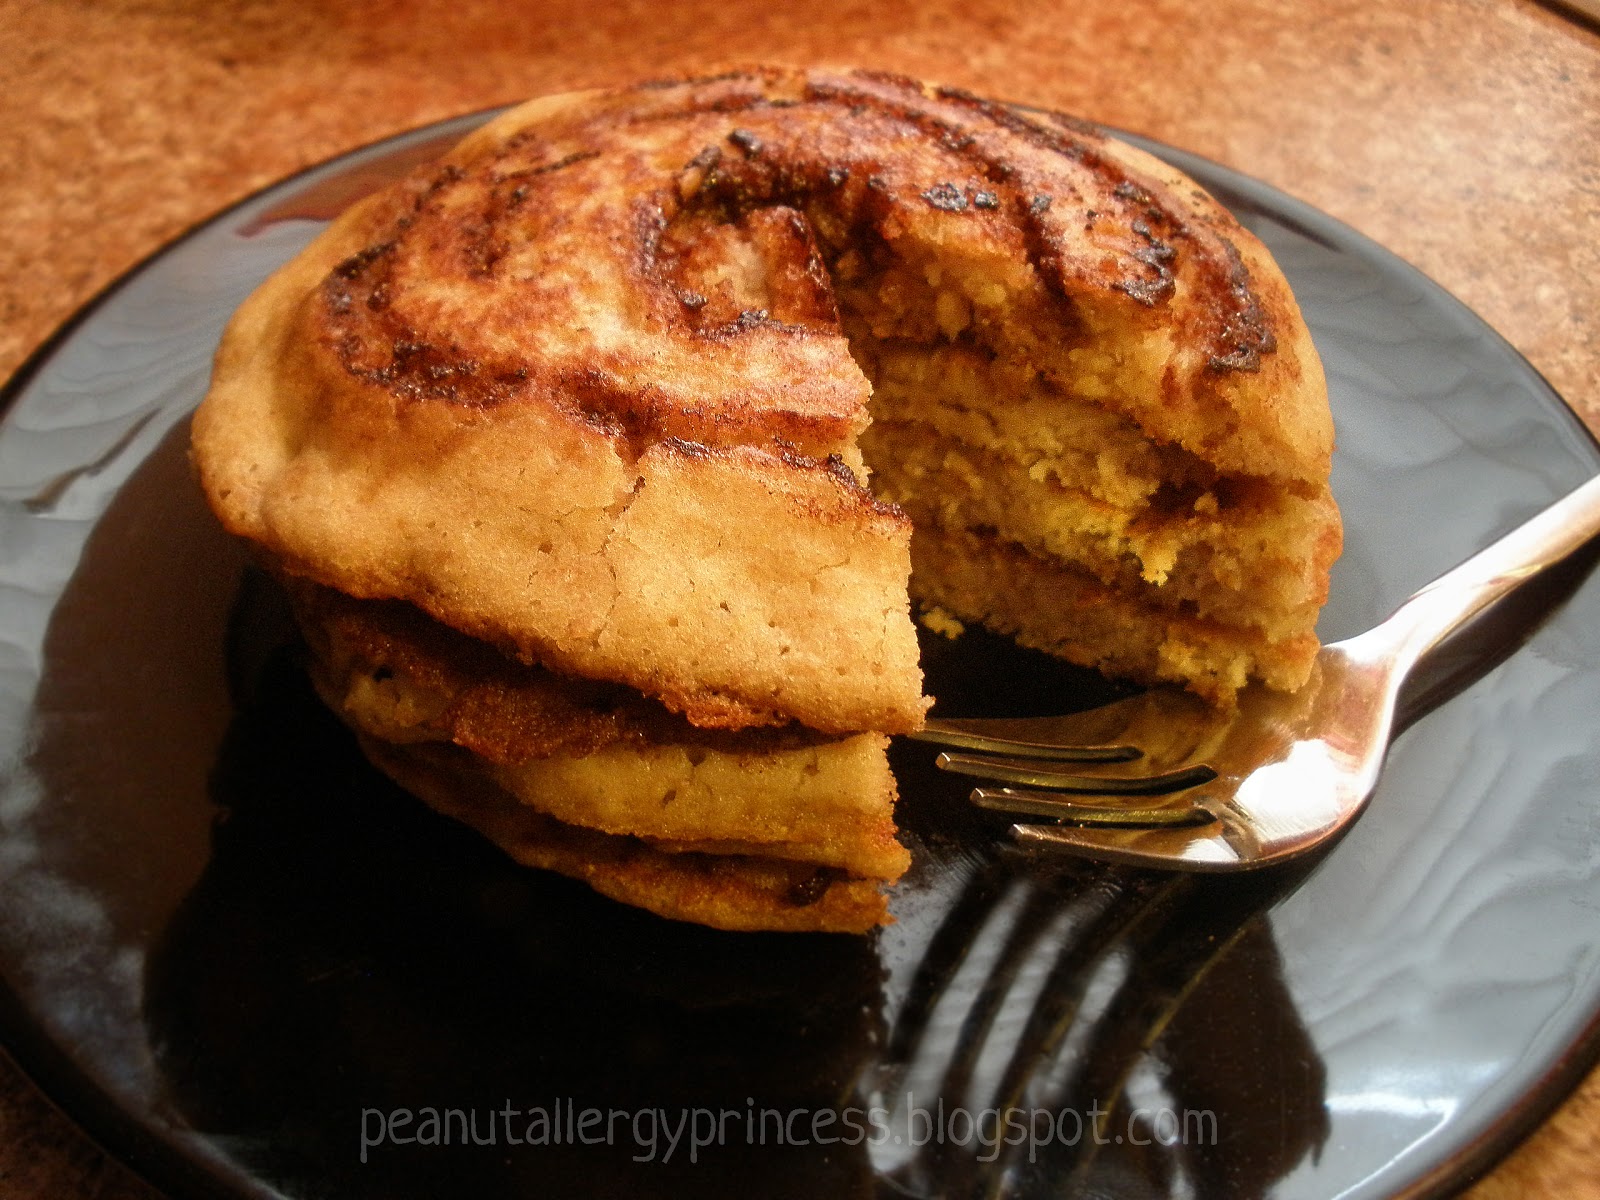
Cinnamon Swirl "Egg-less" Pancakes

Today, we are going to stray away from holiday treats - already. But just for one post. Since Brother #2 had a birthday this week, I wanted to do a fun post for him. When asked what he wanted for breakfast on his big day, he said pancakes. But I couldn't do just regular pancakes, so I spiced them up a bit.

These pancakes are so yummy and are great for a quick, delicious "special" breakfast. They can be used for any special breakfast, which could include holidays, birthdays or sometimes even just weekends.

I saw this recipe on Pinterest (where I get a lot of my recipe ideas) and knew that I could easily recreate this with my Fluffy "Egg-less" Pancakes. Not only are they allergy free - they have a lot less sugar than the original and a lot more nutrients!

Cinnamon Roll Pancakes


Cinnamon Filling:
3 Tbsp. butter, just melted 
1/4 cup sucanat
1/2 Tbsp. cinnamon

Pancakes:
1 cup whole-wheat flour (or wonder flour)
1 tsp raw sugar
2 tsp baking powder
1 cup almond milk (or any milk)
1 Tbsp no-sugar added applesauce
1 Tbsp water
1 tsp vanilla
2 Tbsp coconut oil (or butter)

Prepare the cinnamon filling:
In a medium bowl, stir together the butter, sucanat and cinnamon. Scoop the filling into a heavy-duty ziploc baggie and set aside.

Prepare the pancake batter:
Combine the first 4 ingredients and mix slightly. Add milk, applesauce, water and vanilla. Whisk together until just combined. Be careful not to over mix - it should still be lumpy. Set aside to rest for a few minutes.

Heat a large skillet over medium-high heat until hot. While pan is heating, add coconut oil. As soon as the coconut oil is melted, add it to the pancake batter. Return pan to stove and stir in coconut oil in to batter.

Cook the pancakes:
When the pan is hot, pour 1/4 cup of batter into the skillet for each pancake. Snip the corner of your bag of cinnamon filling and squeeze the filling into the open corner. You may  need to knead the cinnamon filling before clipping the bag as the filling tends to separate.

When your pancakes begin to form bubbles, add the filling. Starting at the center of the pancake, squeeze the filling on top of the pancake batter in a swirl. Be careful not to get the filling too close to the side. You want to keep it about 1/4 of an inch away from the edge or it will bleed over (your pancakes will still taste delicious, they just won't be as presentable. Which, if you are simply feeding them to a pack of starving children, it probably doesn't matter. Cook the pancake 2 to 3 minutes, or until the bubbles begin popping and the pancake is golden brown on the bottom. Slide a wide spatula underneath the pancake and gently but quickly flip it over. Cook an additional 2 to 3 minutes, until both sides are golden brown. 

When you flip the pancake onto a plate, you will see the cinnamon filling has made a nice swirly pattern on your pancake. Wipe out the pan with a paper towel (or don't if you are too lazy - which sometimes I am) and repeat with the remaining pancake batter and filling.

We liked our pancakes topped with a little powdered sugar. YUM! If you can get fresh fruit, that would add even more yumminess to these pancakes. EXTRA YUM! 


Recipe inspired from Recipe Snobs


Jana

Tuesday, November 20, 2012

Pumpkin Quinoa Granola

Thanksgiving is almost here... where has the time gone? It seems like the past few months have flown by and now the year is almost over. So, what does the end of the year coming up so fast have to do with granola? Absolutely nothing.

But, speaking of Thanksgiving, there are a lot of posts on Pinterest and food blogs with recipes for breakfast on Thanksgiving day. The problem with most of the ones I have seen is that they are very rich, full of sugar and fat and not a great way to start a day that will most likely be full of other food that falls into that category. I wanted to post a recipe that would be a yummy yet healthier way to start your Thanksgiving day.

Most store bought granola, while touted as a health food, is anything but healthy. It also may contain or be contaminated with peanuts. I prefer to make my own and it is super easy!

This post is the debut of a recipe on my blog containing quinoa... which is hard to believe because I use it quite often. For those who have never cooked with quinoa, here are some interesting facts about this superfood.

* High in protein - Quinoa has more protein than any other grain, it also contains the 9 essential amino acids making it a complete protein
* Lowers your blood pressure - Quinoa is high in magnesium which relaxes blood vessels helping to lower your blood pressure and improve overall heart health
* Helps reduce migraines - Quinoa is high in magnesium which helps with the constriction and rebound dilation of blood vessels that are characteristic in migraines. Quinoa also has riboflavin which has been proven to lessen the frequency of migraines
* Fights off dangerous cancer and disease-causing substances - The manganese and copper found in quinoa are powerful antioxidants that help fight disease
* Higher in calcium, phosphorus, magnesium, potassium, iron, copper, manganese and zinc than wheat, barley and corn
* Gluten free - Quinoa is a gluten free food and good for those who can't tolerate any grains because it is a seed (it is actually related to spinach - which is why it is a powerhouse when it comes to nutrition).

For more information on quinoa, check out this post from Unconventional Kitchen.

I like to eat my granola as cereal with vanilla almond milk on top. You can also add it on top of yogurt or applesauce or eat is straight out of a bag as a snack.

Pumpkin Quinoa Granola

1 cup brown rice cereal (like Rice Krispies except made from brown rice)

1/2 cup instant oatmeal

1/2 cup cooked quinoa

2 Tbsp ground flax seed

1/4 cup shredded coconut (preferably without added sugar - get it at a health food store)

1 Tbsp coconut oil

2 Tbsp pure maple syrup

1/2 cup pumpkin puree

1/2 tsp pumpkin pie spice

1 tsp vanilla

1/4 cup finely chopped walnuts * (optional)

1/4 to 1/2 cup dried fruit (raisins, cranberries, cherries, etc...) (optional)


Preheat oven to 300 degrees F. Line a rimmed baking sheet with parchment paper (or tinfoil in a pinch).

Combine brown rice cereal, oatmeal, cooked quinoa, ground flax, shredded coconut and chopped walnuts (if using) in a bowl.

In a small saucepan heat coconut oil, maple syrup, pumpkin puree, pumpkin pie spice and vanilla over low heat until melted and incorporated. Stir into dry mixture.

Spread in a single layer on prepared baking sheet. Cook for 30 minutes, stirring every 10 minutes. Let cool on baking sheet. Break into clusters and mix in dried fruit (if using).

* One of the nice things about using quinoa in this recipe is that if you are unable to use nuts, there is still protein making it a filling breakfast.

Recipe adapted from Cookie Quinoa


Jana


Thursday, November 1, 2012

Egg-less Zucchini Spice Bread


Fall is the time of year when there always seems to be an abundance of zucchini - especially if you grow your own garden. While I am always looking for new ideas to use up my zucchini, there is always the favorite. Zucchini bread. I am also a lover of spice bread - meaning cinnamon, cloves, nutmeg - those kind of spices. So, why not blend the 2 together!

I had a recipe from years back that we used to make, but it calls for 3 eggs and oodles (and oodles and oodles) of sugar. While it tasted great, it was definitely a "treat" and not something to be eaten for breakfast. Obviously I needed a version without eggs and I wanted one that was a bit healthier. This is what I came up with after combining and changing a number of other recipes. It is equally as delicious, but also more filling and worthy of breakfast. Or lunch. Or why not dinner?

Egg-less Zucchini Spice Bread

2/3 cup turbinado (or raw) sugar

2/3 cup sucanat

1 cup coconut oil (or butter. Or even half coconut oil and half butter)

2/3 cup no-sugar added applesauce

1 Tbsp. ground flax mixed with 3 Tbsp. water (or 1 egg)

2 cups grated zucchini

3 tsp. vanilla

1/2 cup whole wheat flour

2 1/2 cups wonder flour (or other whole grain flour, like spelt or kamut)

1 tsp. salt

1 tsp. baking soda

1/4 tsp. baking powder

3 tsp. cinnamon

1/8 tsp. nutmeg

1/8 tsp. ground cloves

1/2 cup finely chopped walnuts or pecans (optional)

1/2 cup mini chocolate chips (optional - for a special occasion)

Preheat oven to 325 degrees F.  Spray loaf pan (or muffin tins) with non-stick spray.

Combine sugars, oil, applesauce and flax mixed with water in a large bowl. Beat until well blended. Add the grated zucchini and vanilla and mix well. In another bowl, sift together the dry ingredients.

Pour the batter into the prepared pan. Bake at 325 degrees F for 45-55 minutes (for loaf) or 20-25 minutes (for muffins).

These are super yummy served with homemade Apricot Jam or Raspberry Apricot Jam.

Yes, we love muffins more than "loaves" at our house!
Jana

Wednesday, September 26, 2012

Egg-less Banana Bread Muffins

I told you a couple weeks ago that I would share some recipes that I used to give me energy while running the Red Rock Relay. Well... you are in luck. Not only is this muffin packed full of good-for-you-while-running ingredients, they are just plain delicious! Who doesn't love banana muffins? Well, The Brother's don't, but they don't like much of anything with banana in it.

I love to hide ground nuts in my muffins. The Brother's don't like nuts, but when I grind them until they are very small they are mostly unnoticeable. They add a yummy flavor and some healthy fat and protein to the muffins. Add some whole-fruit jam (check out this post) for extra yumminess! Combine that with some fruit and you have a quick, healthy breakfast, snack or even lunch. These would be great sent to school in a divided container.

There is a healthy version, and a healthier version (in parentheses). Pick the one that suites your lifestyle - and pantry supplies!

Egg-less Banana Bread Muffins

3 ripe bananas

1/4 cup butter (1/4 cup coconut oil, melted)

1/2 cup sugar (1/2 cup raw or turbinado sugar)

1/2 cup brown sugar (1/2 cup sucanat or cane sugar)

1 cup wonder flour

1 cup whole wheat flour

1 tsp salt

1 tsp baking soda

1 Tbsp cinnamon

1 tsp ground nutmeg

1/2 tsp ground ginger

1/2 cup chopped walnuts for pecans (optional)

1/2 cup mini chocolate chips (optional - for special occasion or extra fun treat)


Preheat oven to 350 degrees F. Cream butter (oil) with sugar.

In a separate bowl, mash bananas with a potato masher or fork. Add bananas to butter (oil) and sugar and mix well.

Mix all dry ingredients together in a separate bowl. Combine dry ingredients with wet, making sure to scrape the sides of the bowl and mix well. Stir in the nuts, if using.

Spray cooking spray in muffin tin and add a spoonful of batter to each slot - 3/4 of the way full.

Bake for 25 minutes or until tops are lightly browned.

Makes 12 muffins.

Recipe adapted from The Clean Eating Mama


Jana


Saturday, September 1, 2012

No Cook Oatmeal


I had plans to post this a bit earlier this morning, but thanks to the lightning early this morning, we thought our computer had been fried. Luckily, it did not fry and everything is safe but it was off limits for a time this morning. But now, we are back on track and ready to post.

I am very excited that the school week is finally over! Some weeks just seem longer than others and, for me, this was one of those. Here's to a long weekend to relax.

Now, for the last recipe in this week long segment, I wanted to post a more "adult" recipe (meaning this is one my kids really don't like).  I learned this recipe from Desiree at Unconventional Kitchen. Check out her site for tons of great tasting, healthy recipes and lots of tips for eating better. She also has a lot of information about eating gluten free.

Back to the oatmeal... I LOVE, LOVE this recipe. I find that I crave it a lot and could eat it almost every day. I will be sad when fresh berries are no longer available because they are the best with this oatmeal. It is super easy to throw together and is lighter than cooked oatmeal. This oatmeal keeps me full all morning and gives me tons of energy. Sounds amazing, right? It is!

You can make this in any quantity and mix or match ingredients according to your taste and what you have on hand. I generally just throw things in (without measuring) until it looks (and tastes) right to me.

No Cook Oatmeal

Old-fashioned Oats (not instant)

Raw Honey

Coconut Oil

Cinnamon

Chopped nuts (I use a mix between walnuts, almonds and pecans - whatever I am in the mood for)

Almond Milk

Kefir (optional, but has a ton of good probiotics)

Fresh fruit (anything you have on hand, but berries are especially yummy!)

If your coconut oil is solid (meaning it is cold in your house), scoop some into a small bowl. Place the small bowl inside a larger bowl full of hot water for a few minutes until it becomes liquid.

Combine the oats, chopped nuts, raw honey, coconut oil and cinnamon in a bowl. Mix well to incorporate all of the coconut oil. If you leave it just sitting (without mixing), you will have hard chunks of coconut oil when you pour in the milk. Not very tasty - trust me.

Chop your favorite fresh fruit and throw it on top.

Pour almond milk (and kefir - if using) over the whole thing. You can let it soak for a few minutes if you have time or eat it right away.


Recipe adapted from Unconventional Kitchen
Jana


Friday, August 31, 2012

Pecan Maple Breakfast "Cookies"

Another school week is coming to an end. This week for us has been super busy with school, soccer, PTA, scouts and everything else that goes into a school week. I think I will be glad when this week is over and we get a 3-day break over the weekend (yet weekends always seem to be busy too!)

This recipe ought to be a hit - who doesn't want cookies for breakfast? Especially yummy cookies that are healthy. These cookies are sweetened with applesauce and maple syrup. Add some fresh fruit to these cookies and you have a filling breakfast that is also fast and easy and can be eaten on the run (because those mornings happen sometimes). I think these would be fun to send in a school lunch as well. For and extra special day... you can add a handful of mini chocolate chips to your cookies. Yum!

Cookies

1 cup whole wheat flour*

3/4 cup rolled oats

1/2 tsp. baking soda

1/4 tsp. salt

1/4 cup no-sugar added applesauce

4 Tbsp. maple syrup

2 Tbsp. butter, softened but not melted

1 Tbsp. ground flax seed mixed with 3 Tbsp. water*

1/2 tsp. vanilla

1/2 cup finely chopped pecans

Preheat oven to 375 degrees F and grease a cookie sheet.

Whisk together the flour, oats, baking soda and salt.

In a separate bowl using an electric mixer, beat the applesauce, maple syrup, butter, flax seed mixed with water and vanilla.

While beating the mixture on low speed, add the dry ingredients until well blended. Fold in nuts with a spatula.

Drop cookies (I use a cookie scoop) onto prepared cookie sheet. Bake for 8-9 minutes or until they start  to brown.

* It is always best to use fresh-ground flours and flax seeds when baking. That being said, who has time to grind fresh flour every morning. When you do it in advance, it is best to store any fresh ground flours and flax seed in the freezer to maintain freshness, nutrition and prevent them from going rancid. When buying store bought whole wheat flour and pre-ground flax seed, keep in mind that you have no idea how long they have been sitting on the shelf and most likely have lost quite a bit of nutrients. But it works in a pinch until you can get yourself a wheat grinder. Flax seed can be quickly ground in a high-powered blender or in a small coffee grinder.


Recipe adapted from 100 Days of Real Food


Jana